
As interest in harnessing wind energy grows in the United States and around the world, several trends and events are converging in support of that interest. They include a desire to lessen dependency on petroleum products, rising energy prices, and a recognition that environmentally sustainable building management practices can be environmentally responsible while resulting in cost savings, as well. Building owners and managers can take steps toward the U.S. Green Building Council’s LEED® certification and take advantage of federal and state tax incentives that will help save money in the long run.
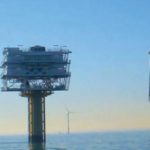
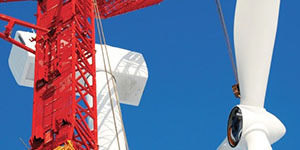
Whether the focus of a wind project is to supply power for greenhouses on a farm or to install turbines for larger-scale commercial energy supply, proper turbine siting is crucial for optimal performance and return on investment, despite the scale of the project.
Once a site is determined to be an appropriate candidate for a wind turbine—through consultation of local and regional wind resource maps, meteorological data, and existing studies—a thorough, on-site wind assessment must be carried out that measures wind speed and direction at heights appropriate for the project, and at locations suitable to represent the project. While appropriate permits and permissions are being obtained for the test site or sites, you will need to select monitoring equipment.
The intent of this article is to provide project managers working on small- to moderate-scale wind energy projects with information about how data loggers fit into wind resource site assessment. This article examines sensor, data logger, and communications options, with advice on what to look for in selecting such equipment. Then you will find information about equipment mounting hardware to help ensure optimal performance during your project’s monitoring period. This information will help simplify the equipment selection process, while also helping you save time and money for your site assessment project.
Central Components
The main components of a site’s wind resource assessment are wind speed and wind direction sensors that plug into a data logger, all of which are mounted on an appropriately sized tower. Knowing a bit about sensors and loggers will help you choose the right devices for your budget and ensure that you collect data reliably and accurately.
Sensors
Sensors for a wind assessment project are often mounted tens of meters off the ground and must measure environmental parameters accurately and consistently for at least a year, across all the seasons. In addition to doing their job of measuring wind parameters, sensors must withstand rain, snow, ice, and humidity. When evaluating sensors, check the manufacturer’s specifications regarding:
• Operating temperature—What happens during freezing temperatures?
• Response time—Will short gusts be recorded?
• Connection to logger and deployment—Is there any wiring required, or does the sensor simply plug into the logger?
• Durability—What are the sensor components made of? Are the moving parts strong?
• Expected lifetime—For how long will the sensor operate?
• Accuracy and Resolution
Factors to consider for each type of sensor include the anemometer. Wind speed is the most important measurement in your assessment. Cup-style anemometers are the most common for wind power projects, consisting of several cups that rotate around a vertical shaft.
The anemometer should be sturdy enough to withstand sustained winds and winds gusts of up to at least 100 mph, depending on your location. Keep in mind that wind speed increases with vertical distance from the ground. Check into the manufacturer’s specifications for maximum wind speed, starting threshold, response time—often referred to as distance constant, this describes how responsive the anemometer is to changes in wind speed—expected lifetime, and materials for the shaft, cup, and bearings.
Ideally, anemometers are placed at three locations on a tower: the proposed turbine’s hub height, the height of the highest blade tip, and the height of the lowest blade tip. Often, however, towers are used that are shorter than the proposed turbine hub; there are numerical models that allow the input of data from lower heights to be applied. Budgetary restrictions may also limit data collection. In any case it’s a good idea to mount two anemometers at each tower height for data replication, or in case of sensor failure.
Another important consideration is wind direction. Wind vanes are often part of the anemometer unit, but they may also be available as stand-alone devices. Most important is to check the resolution of the vane to make sure the data output is in small-enough units for you to use it effectively in your assessment. Also consider maximum wind speed—especially whether the vane is designed to withstand typical and maximum wind speeds at your site—expected lifetime, and the materials of which the fins and shaft are constructed.
Other sensors can monitor temperature, relative humidity, and barometric pressure. It may be useful to be able to link temperature, RH, and barometric pressure to wind speeds and direction, though it is not strictly necessary for all site assessments. If there are meteorological stations nearby you may opt to omit these sensors, depending on your project requirements and resources.
Data Loggers
All data logging systems for measuring wind parameters consist of multiple sensors that connect to a data logger, which records and stores all data at prescribed time intervals. When evaluating data loggers, keep simplicity and flexibility in mind as you consider the following points.
Housing: The logger will be outside for a year or more, so check if the enclosure is strong and weatherproof enough to withstand wind, rain, and curious animals, and that the electronic components will stay dry.
Data channels: There is usually a limit to the number of sensors that can be plugged into a logger. Does the logger have enough data input channels? Can more be added?
Power: If there is a battery, will it last the full duration of your study? If not, how easily can new batteries be swapped in? Will the data be safe during a power outage? Check about solar and rechargeable battery options, as well. Specific power options may be recommended for certain data download options.
Configuration: Some sensors require programming for deployment, while others simply plug in and are immediately recognized by the logger. Can you configure sensors in the field with or without a laptop, or do you need to set everything up in the office beforehand?
Flexibility: You may decide to add other sensors sometime during the monitoring process, or at a future date for another application. Can the logger accept a wide variety of sensor inputs, including third-party sensors?
Cable length limitations: Towers can be very tall, and you must ensure that the logger can handle all the cables necessary to reach the sensors. In some cases you may need to use multiple loggers.
Today’s data logging systems include a wide variety of data retrieval options, from cellular remote communications to on-site laptop computer download. The next section describes the different options available.
Data Communications Options
There are several options for downloading data from your wind resource monitoring system, and they essentially break down into two categories: manual download, and remote communications. Each has its strengths, and you’ll be better prepared to assess them if you first consider the following:
• Monitoring period—How often would you like to download data? You’ll be monitoring wind parameters at the site for a year or more, so how often would you like to check in? How many parties are interested in the data?
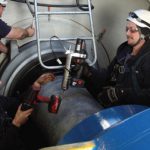
• Maintenance—How often will you do routine maintenance checks to be sure that the logger, sensors, and tower are in good working condition and repair? Such checks require staff and travel time.
• Location—Where is the station located? Is it in a vandalism-prone area, many miles from roads, or right on the edge of the project owner’s property?
• Budget—What’s your budget? Some communications options are more costly than others at the outset, but they may save money in labor and travel costs over the life of the project.
• Future applications—Will you reuse the equipment for future wind resource assessment projects?
Manual On-site Download
In light of these questions, let’s consider the difference between manual on-site downloads and those conducted from a remote location. Data shuttles are small, handheld devices that plug into a data logger and retrieve data. They are usually designed for field conditions and are simple to operate, often involving a single-button download. Alternatively, you can use a laptop computer equipped with the appropriate software and interface cable.
This is often the most inexpensive option, though it does have some limitations. Technicians must visit the logger to download data, and there may be no way to know about malfunctions until data has been examined.
Remote Data Download
Remote communications allow for real time Internet-based access to data. Rather than going out into the field, the user simply logs onto a Web site to view and download data, thus saving time and money on travel and labor and minimizing the chance of data gaps due to equipment failure.
Operators can easily and frequently monitor sensor and battery status or make adjustments to logging intervals, right over the Internet. It is easy to check that sensors and loggers are working properly, and cellular phone and e-mail alarm notifications can even be set for when sensor parameters are out of a set range, if equipment fails, or if battery power is low. The sooner you know about a system malfunction the faster you can get out to the site, fix the problem, and continue collecting uninterrupted data.
Two data communications systems available today are cellular and Wi-Fi. Cellular systems require a cellular data contract, and the logging system must be within provider range. With Wi-Fi, data transfer is accomplished via a Wi-Fi network or router connected to the Internet. There is no need to pay for cellular service, but your installation does have to be within range of a Wi-Fi router. Users can set notification alarms that transmit to cell phones and e-mail addresses with either system.
Mounting Tips for Data Logging Systems
In addition to the sensors and data logger you’ll need to select hardware and other accessories for mounting and connecting the devices, and to ensure that system components are installed properly. Once it’s up and running animals, weather conditions, and vandals may act upon your monitoring system, and periodic field visits and/or logger alarms are required in order to ensure smooth operation.
You will need to attach your sensors and logger securely to your chosen tower in a fashion that allows for optimal data collection. Sensor manufacturers usually provide a selection of hardware options, so check around to see what’s available before you consider spending money and time to design or make your own. In most cases equipment should be mounted on sturdy metal arms and brackets, with several anchor points. You should consult the manufacturer’s recommendations for placement distances, but here are some factors you’ll have to consider:
Sensors: Mount anemometers and vanes far enough away from the tower structure and other sensors to avoid interference. Each sensor should have its own individual boom that holds the sensor well away from the tower, so consult your manufacturer for details. Temperature and humidity sensors require solar radiation shields, and you should make sure that they are designed to shed water and operate in freezing conditions.
Cables: Sensors connect to the logger via cables, so order enough of the proper length to reach from sensors to logger. Wrap cables along the tower from the sensors to the logger and secure them with UV-resistant tape or ties, allowing enough slack in chafe-prone areas.
Logger: Make sure the logger is securely housed inside a weatherproof, locked, tamper-resistant structure. Mount it high enough so that animals can’t reach it from the ground, and close any gaps to deter birds. Make sure the enclosure is properly sealed, carefully following the manufacturer’s instructions and, if applicable, mount the solar panel so that it will receive adequate sunlight throughout the day and through the seasons. Again, your sensor, logger, and tower manufacturers will have detailed guidance specific to the equipment you have selected.
Conclusion
Site-specific wind resource assessment is one of the most time-consuming and important steps of a wind energy project. This article will hopefully help make you aware of the data-collection and communications options available to you so that you can make the best choice for your site, project, and budget.